 SnapAuth
SnapAuth Integration Guide: Web
Here's a quick primer on how to add support for passkeys to your site with SnapAuth. With this, you should have results in a few minutes!
Before starting, a few assumptions:
- You are generally familiar with HTML and JavaScript
- You already have some sort of user account system
Our full documentation, which covers the whole API and multiple programming languages, is available at https://docs.snapauth.app.
Register for SnapAuth and get your API keys
If you haven't done so already, create an account at SnapAuth. It's quick and free, and we won't sign you up for any mailing lists or other annoying stuff. This will take you to the dashboard.
In the dashboard, set up your organization. All you need to start is a name, which can be anything meaningful to you.
This will automatically create your first environment for localhost.
You can create additional environments later.
You'll need to do this to go live.
For now, copy the publishable key and keep the page open.
Add the SnapAuth SDK
Depending how your website is built, you can use NPM or directly include it with a <script> tag.
NPM:
npm i @snapauth/sdk
If you're using a different package manager, adjust accordingly.
Our SDK is @snapauth/sdk.
Set it up somewhere in your app:
import { SDK } from '@snapauth/sdk'
const snapAuth = new SDK('your_publishable_key')
Naturally, replace your_publishable_key with the actual value from the dashboard.
Directly linking:
<script src="https://unpkg.com/@snapauth/sdk"></script>
<script type="text/javascript">
const snapAuth = new SnapAuth.SDK('your_publishable_key')
</script>
Add a server SDK
This will guide will use our PHP SDK on the backend, but we have native support for other languages.
composer require snapauth/sdk
Saving a passkey
In order to let users sign in with passkeys (or any WebAuthn credential), they first must save one on your website.
This process is called credential registration.
You can do this when a user first registers, or let users add them later. This will be for an existing user.
First, add a button:
<button type="button" id="add-passkey">Add a passkey</button>
And add a click handler for it:
const addPasskey = async (e) => {
  e.preventDefault()
  const registration = await snapAuth.startRegister({
    username: '[email protected]', // Form value or something already known
  })
  if (registration.ok) {
    // POST registration.data.token to your backend
    post('/passkey/add', { token: registration.data.token })
  } else {
    console.error(registration.error)
  }
}
document.getElementById('add-passkey').addEventListener('click', addPasskey)
This can also be on form submit, etc.
On your backend, let's build the API used above.
Grab the API Secret from the dashboard and put it in an environment variable named SNAPAUTH_SECRET_KEY.
This will be auto-detected by our SDK (but feel free to adjust as needed, you can provide it explicitly).
// Assumes the user is already signed in.
// If you're registering a new user, this should be the newly-created account.
// Adjust to fit your backend/framework.
$user = getCurrentUser();

$snapAuth = new \SnapAuth\Client();

$token = $_POST['token'] ?? null;
if ($token === null) {
  // Invalid request, show an error to the user and abort.
}

try {
    $credentialId = $snapAuth->attachRegistration($token, [
        'id' => $user->id,
        'handle' => $user->username,
    ]);
} catch (\SnapAuth\ApiError $e) {
    // Decide how to proceed
}
That's all! The user has added a passkey to their account.
Using a passkey
Now that your user has saved their passkey, it's time to let them use it!
We're going to make a simple form to sign in:
<form id="signin">
  <input type="text" autocomplete="username webauthn" placeholder="Username" id="username" />
  <button type="submit">Sign in with a passkey</button>
</form>
We'll use the snapAuth.startAuth() API when the form is submitted:
const onSignInSubmit = async (e) => {
  e.preventDefault()
  const username = document.getElementById('username').value
  const auth = await snapAuth.startAuth({ username })
  if (auth.ok) {
    post('/your/signin/url', { token: auth.data.token })
  } else {
    console.error(auth.error)
  }
}
document.getElementById('signin').addEventListener('submit', onSignInSubmit)
Like before, we'll process this token on the backend:
$snapAuth = new \SnapAuth\Client();

$token = $_POST['token'] ?? null;
if ($token === null) {
  // Invalid request, show an error to the user and abort.
}

try {
    $authInfo = $snapAuth->verifyAuthToken($token);
    signInUser($authInfo->user->id); // Again, app-specific
} catch (\SnapAuth\ApiError $e) {
    // Decide how to proceed
}
And we're done! You've authenticated the user with their previously-saved passkey.
Going live
This all works on localhost, but you'll need to do two things before putting this in front of real users:
- Create another environment for your actual domain in the Dashboard:
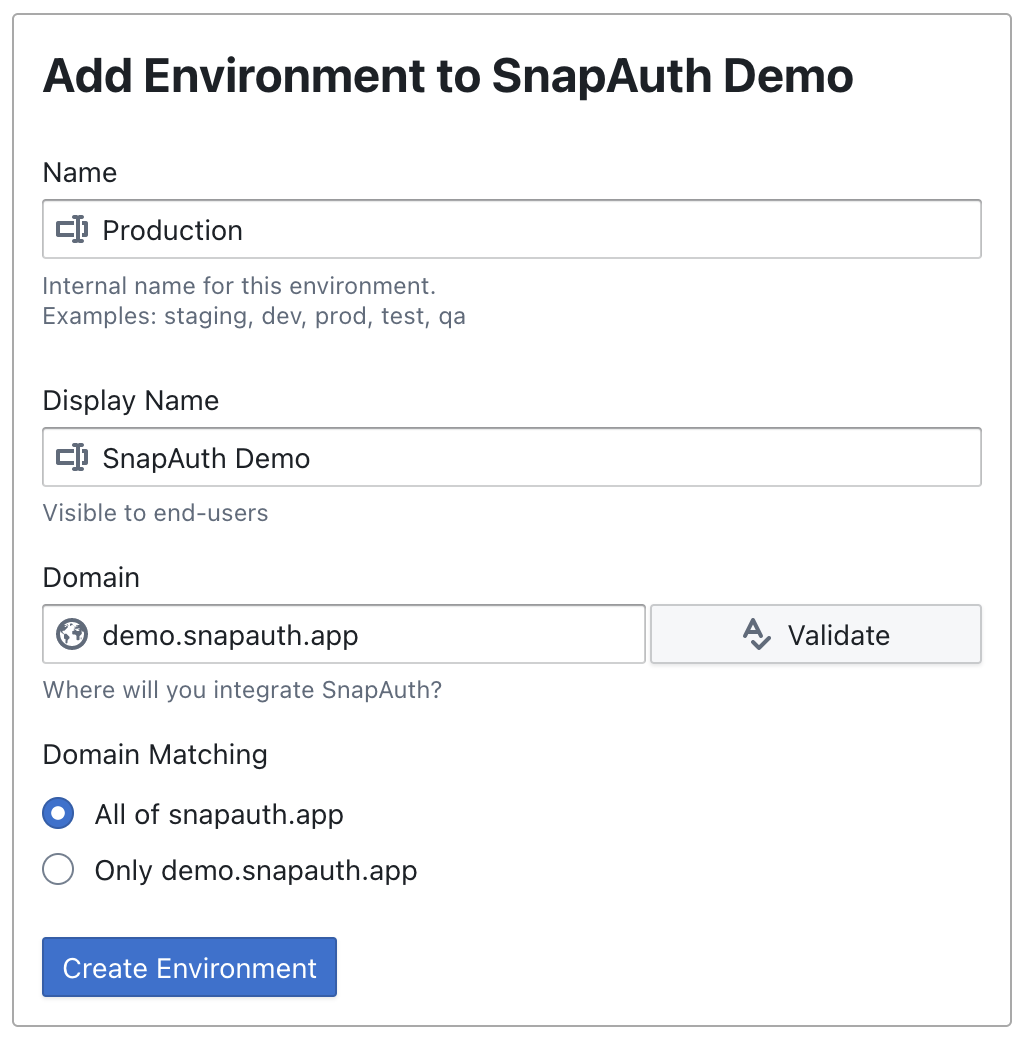
- Update your API keys to the new values
Passkeys are specific to a domain, which prevents most phishing attacks. This means each domain needs its own set of API keys.
Important: If you try to use a localhost key on any other host, you'll get an error.
You must use the API keys that match the deployment domain.
Don't worry - you can add as many domains as you want!
That's all
If you wanted more steps, consider manually adding WebAuthn without SnapAuth instead 🙂
Our goal is to make this as fast and easy as possible, so you can focus on what makes your app special.
Try it today
Adding passkey support can really be that quick and simple with SnapAuth! Give us a try - no credit card required.